iBekit Video Universal Repair can fix/restore videos with lost or corrupted data.
How to Fix BSOD Video Scheduler Internal Error? 9 Best Fixes
Confronting the BSOD video scheduler internal error is not a joke if you are primarily a gamer, video editor, or high-end task performer.

Running your Windows PC with this error can leave your tasks unsaved and keep you away from peak gaming within a second. Therefore, resolving the BSOD video scheduler internal error is a must-have task before you perform any of the activities.
In this blog, I'll explain to you the different methods to resolve the BSOD error.
Guide List
- Method 1: Restart the PC Immediately
- Method 2: Update the Display Drivers
- Method 3: Fix the Local Disk Error(s)
- Method 4: Run "sfc /scannow" Command
- Method 5: Resolve Memory Diagnostic Errors
- Method 6: Install the Windows Available Updates
- Method 7: Uninstall the Recently Installed Software and Hardware
- Method 8: Reset the Windows OS
- Method 9: Recover the Lost Data Via iBekit Toolkit HOT
How do I Fix the BSOD Video Scheduler Internal Error?
To resolve the BSOD video scheduler internal error, follow these steps.
Method 1: Restart the PC Immediately
Once you encounter the PC with the BSOD Video Scheduler Internal Error, restarting the PC is the first thing to do.
Restart the system first, and then observe the system. If the problem persists, follow the next methods one by one to get rid of this issue.
Method 2: Update the Display Drivers
The internal error of the BSOD video scheduler is most often caused by the outdated display and graphics drivers installed in the window. To get rid of this error, updating the drivers is the first thing to do.
To update the display and monitor drivers, follow these steps.
- Search for the "Device Manager" in the search bar.
- Now click the "Device Manager" on the search result to open it.
- From the "Device Manager" window, click on "Display adapters" to expand it.
- Next, right-click on the available installed drivers one by one and click "Update driver."
- Now, click the "Search automatically for updated driver software" option to install the driver. However, you can click on the "Browse my computer for driver software" option to install the driver locally from the window.
- Next, wait for the driver to be updated and also update the "Monitors" drivers.
- Once you're done with the update, restart your PC to check.
Note:
If the error persists, follow the next method steps.
Method 3: Fix the Local Disk Error(s)
The malfunctioned apps and software, malware, and ransomware installed in the PC can be the most apparent cause of the error. Scanning and checking the local disk "C" errors can help resolve BSOD errors in Windows.
To check and fix the local disk "C" errors, follow these detailed steps.
- Double-click to open the "This PC" folder
- Right-click the "Local Disk [c]" and click on the "Properties" tab.
- Now, click the "Tools" tab from the menu and click the "Check" option in the "Error-checking" section.
- Next, follow the on-screen prompts and click on the "Scan drive" option.
- Now, let the scan be complete. If it finds any errors, follow on-screen prompts to resolve them.
- After this, restart the PC and check whether the issue has been solved or not.
Note:
If this step doesn't resolve the error, follow the next step to run the internal scan command.
Method 4: Run "sfc /scannow" Command
Running the "sfc /scannow" command on a Windows computer helps detect malware, malfunctioning software, and apps installed in the system.
To get rid of the BSOD video scheduler internal error by running this command, follow these steps.
In the start menu search bar, type cmd to search for the command prompt.
From the search result, right-click the "Command Prompt" option and then left-click the "Run as administrator" option.
Now, in the command prompt window, type the "sfc /scannow" and press the "Enter" button to run this command.
Now, wait for the command to complete. Once it is done, type "Exit" to close the command prompt and restart the PC to check for the error.
Note:
If the BSOD error still persists, follow the very next method.
Method 5: Resolve Memory Diagnostic Errors
Memory and internal errors are caused by conflicts between the hardware and installed software within the system. To resolve the BSOD video scheduler internal error caused by the memory issues, run the memory diagnostic errors program on the system.
To do this, follow these steps.
- In the start menu search bar, search for the "Windows Memory Diagnostic" app and click to open it.
- From the Windows memory diagnostic screen, click on the "Restart now and check for problems (recommended)" tab to run the Windows diagnosing errors program.
- During this diagnosis, windows will restart and run a process to diagnose the Windows errors.
Note:
After completing this process, check the errors to see if it is gone.
Method 6: Install the Windows Available Updates
Running the Windows PC with outdated Windows applications and drivers can be a cause to video scheduler internal errors. It creates conflicts with other up-to-date software and apps and shows these errors.
To update the Windows OS manually, follow this method.
- Click on the "Start Menu" icon and click the "Gear" icon to open the Windows setting.
- Now click on the "Update & Security" tab to check and install the Windows update.
- Wait a little and check if the update is available. If yes, then click the "Install now" button to update the Windows OS.
Note:
Restart the PC and check again for the errors.
Method 7: Uninstall the Recently Installed Software and Hardware
One of the reasons for the BSOD Video Scheduler Internal Error could be the recently installed software or hardware. If you owned the PC, then you can recall the installed software and hardware in the near past.
To resolve this BSOD error, uninstall the recently installed software from the window and check for the other malfunctioning apps. Plus, remove the recently added hardware to your PC. It could be the Graphics Card RAMs. To fix this, take out the hardware and examine it. If it is not damaged, clean the hardware and reseed it properly back into its slots.
Method 8: Reset the Windows OS
If the problem and BSOD video scheduler internal error still persist, here's the last thing to do: reset the PC to a starting point.
Here's how you can reset the PC.
- Open the "Windows Settings" from the start menu.
- Now click the "Update & Security" and then click the "Recovery" tab from the left panel of the screen.
- Next, from the right panel, click the "Reset this PC" button to reset the Windows system.
- Now, choose the "Keep my files" or the "Remove everything" option, which will set the PC to default.
- Then, follow the on-screen instructions to complete the resetting of the PC process.
Method 9: Recover the Lost Data Via iBekit Toolkit
Once you reset the PC with or without creating a point, it can lead to the permanent deletion of your system files. The iBekit PC Data Toolkit comes to take you out of this challenging situation.
Here's how you can recover the lost data after resolving the BSOD video scheduler internal error via the iBekit toolkit.
- Download and install the "PC Data Recovery Software" following the on-screen instructions.
- Now, select the file types that you have lost from your drivers after resetting the PC.
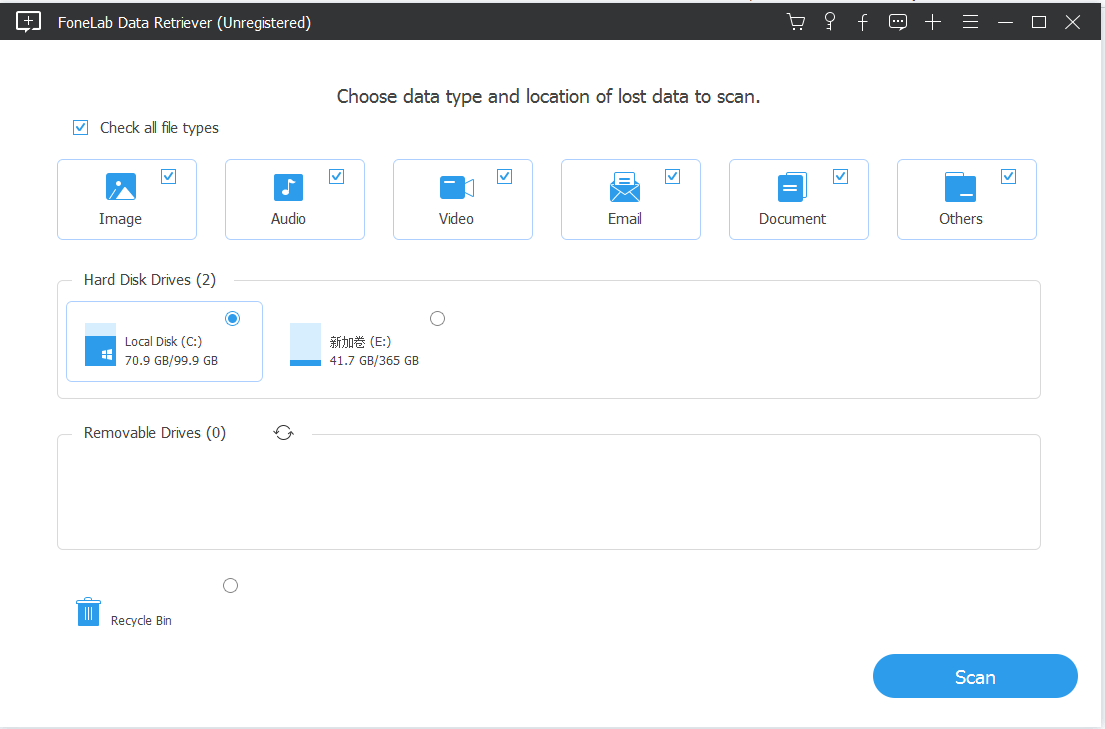
- Next, select the directories from where you want to recover the data and then click the "Scan" button.
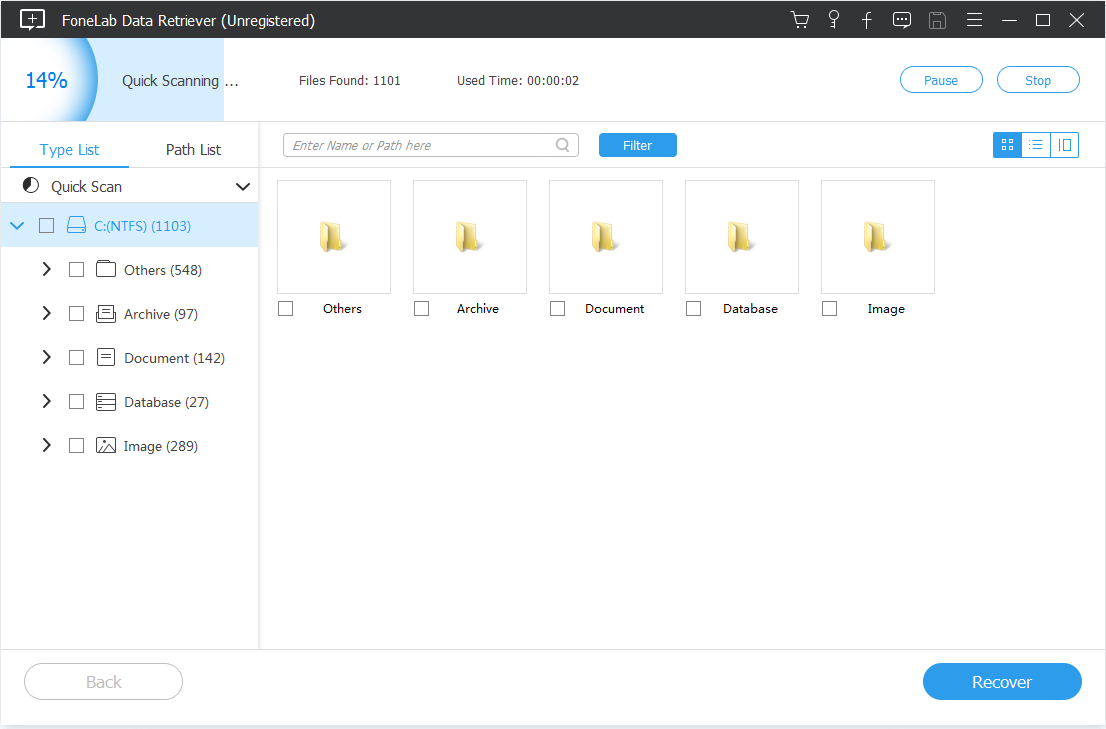
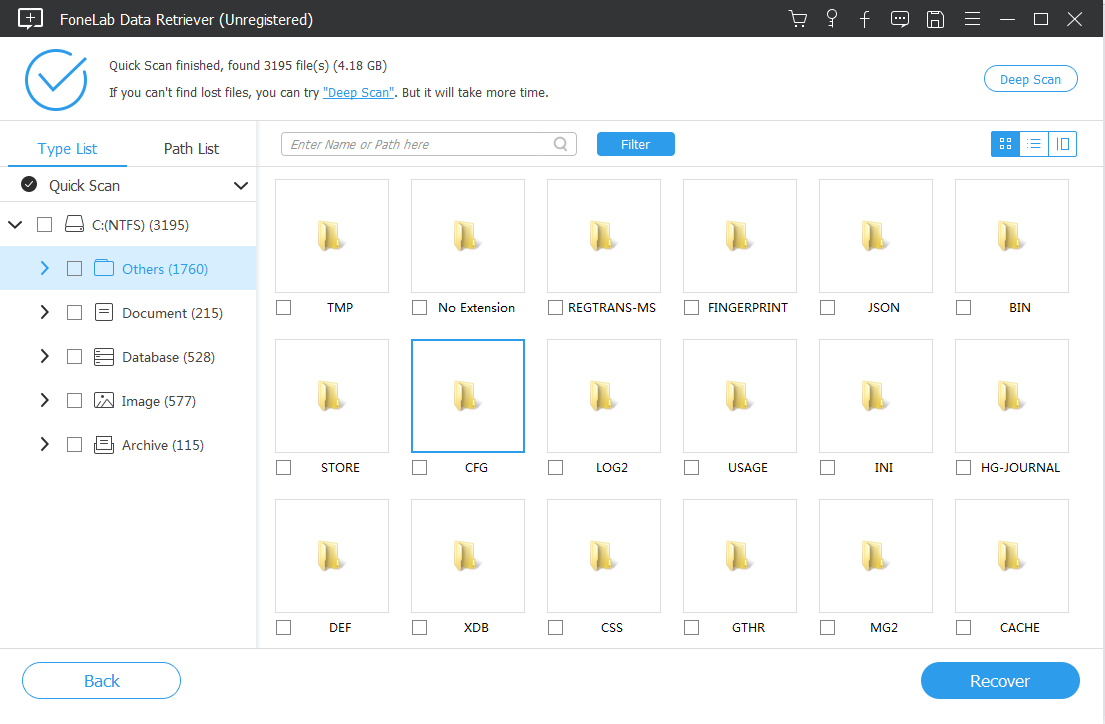
- Now, let the scanning to be complete. If you don't find all the deleted data, then I suggest you deep scan the directories.
- After that, select the files separately or folders to recover the data and then click the "Recover" button to proceed. Opt for the location and click "Recover" again to confirm.
Wait a little to complete the recovery, and now you're done.
Conclusion
In this article, I've discussed the different methods to resolve the system with BSOD video scheduler internal error.
Hopefully, with this guide, you've resolved this issue without any complications. If you're still struggling to get out of this daunting task, let's connect with the iBekit technical team.